Translate

Tuesday, September 22, 2015

Photographing In Yosemite On A Hazy Day


Dale Matson
Click On Photographs To Enlarge
Half Dome With Cloud's Rest To The Left

This time of year is not optimal for photographing in Yosemite. There is usually not water in Yosemite and Bridalveil Falls and there are ordinarily some “let burn” fires going too. The air quality is not good and there has been little rain to clear the air. Having said that, Yosemite is still a wonderful place to be and to photograph. There were no clouds for framing shots but there was a gentle warm breeze even above 8,000’ on Sentinel Dome.

My friend and former colleague Dave from Fresno Pacific University is an excellent amateur photographer and came with me. He uses a full frame Canon and had two lenses with him. He had the 24-105mm f4 kit lens and a Rokinon 14mm 2.8 ultra wide lens made for the Canon EF mount.

I had my Sony A7RII, a Sony Zeiss 24-70mm f4 native lens and older model Canon 100-400mm f4.5-5.6. I have a Viltrox Canon EF-NEX II adapter for this lens. Because I had the Canon adapter, I was also able to use Dave's Rokinon lens on my Sony. I was disappointed in most of the shots, which were not sharp when viewed maximum size. My final two photographs are with the Rokinon lens. While I get my Canon lens information included in the photograph file, I did not have any information from the Rokinon lens. It is a manual focus lens and I used my Sony focus peaking.


We went to three locations along Glacier Point Road (I have skied this road in the winter much more than I have ever driven it). We started at Sentinel Dome, and then went to Washburn Point and finally Glacier Point itself. Each location gives a different perspective. Even after Labor Day during the week, parking was packed at Glacier Point. We should have gone there first and worked our way back to the other two locations. The sun is best here in the late afternoon but we were back in Fresno by 3pm.


 El Capitan
 Survey Marker On Sentinel Dome Circa 1905
 Face Of El Capitan 400mm
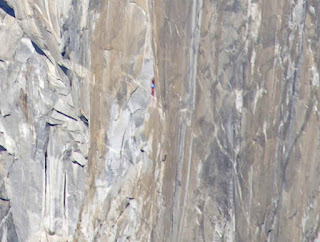
 Climber Seen With Cropped 400mm

150mm From Sentinel Dome
 Famous Jeffrey Pine Now Obviously Deceased
http://shop.anseladams.com/Jeffrey_Pine_Sentinel_Dome_p/5010114-u.htm
 Dave
 Nevada Falls With Bridge 300mm
 Half Dome 400mm
 Vernal Falls 400mm
 Mt. Clark 70mm
Nevada and Vernal Falls and Liberty Cap Top Center 70mm
 Half Dome And Yosemite Valley 7omm

 Mt. Clark 400mm
 14mm
14mm
400mm Cropped With Folks On Nose Of Half Dome
   

Tuesday, September 15, 2015

Backpacking In The Mountains: Primed And Ready


Dale Matson

Click On Photographs To Enlarge

Sony Zeiss 55mm f1.8 

There is an ongoing debate about prime versus zoom lenses and I am somewhere in the middle on this, having both types of lenses. I know that some zoom lenses are superior in image quality to some prime lenses. I also know that some primes are actually heavier than zooms. For example, my Canon 17-40mm f4 at 1.1 pounds is lighter than the Sony Zeiss 35mm f1.4 at 1.39 pounds.

For the first two years backpacking with my Sony A7, I used only a single lens. It was the Sony Zeiss 35mm f2.8. This combination was slick because I could hang it off my belt in a small Lowepro camera bag. It was lightweight and quickly accessible. Last year on a day trip in Pear Lake in Sequoia National Park, I was faced with too much open area near a rock formation called the Watchtower. I couldn’t bring the view closer. On that same hike, I arrived at Pear Lake and couldn’t fit the lake with the towering granite backdrop into a good photograph.

Since that time, I have been experimenting with lenses on several day and extended mountain hikes. One thing I also did was review the file data on hike photographs. When I had different options with the lenses I had with me (both prime and zoom) what focal lengths was I selecting most often? In terms of landscape photography, what could I add that would help me be wider and longer than 35mm? Just how many lenses would I need at a minimum when I am backpacking in the mountains?

This varies with degree of access. When I can drive to a view, I can take all my lenses with me. I think some folks who call themselves “mountain photographers” use this approach. Many of the iconic Ansel Adams photographs were taken from the roof of his car. On a day hike at altitude, even with thousands of feet of gain, I can still take lots of lenses but am more selective. I still have to carry food water, GPS, Satellite phone and other emergency gear. If only I was still young enough to be an ultra runner. It has been said that most of Galen Rowell’s (he was a trail runner) wonderful Sierra Nevada images could have been taken with a 24mm and 80-200mm zoom lens. He was a minimalist on the trails. Today Leor Pantilat is the trail runner with the camera and many of his fine photographs are from mountain peaks. I have no idea what camera(s) he uses.

I want to also mention the issue of personal weight. There is no point in being an ounce counter with camera and backpacking equipment if you are above your ideal body weight. Period!

For backpacking in the high Sierras, I have three lenses for use with my Sony A7R2. I have my walking around lens that is the Sony Zeiss 55mm f1.8. I call it my “overview lens”. I have an adapted Nikon 24mm f2.8 AIS lens that does a wonderful wide-angle job. My short telephoto is a lightweight adapted Contax/Yashica Zeiss 85mm f2.8 lens. I also carry a C/Y Zeiss Mutar II 2X teleconverter for the 85mm lens which extends this lens to 170mm. With the Sony A7R2 IBIS I don't need to carry the additional weight of a tripod. This is a lightweight package for me for mountain landscape backpacking photography. 

 C/Y Zeiss 85mm f2.8
 C/Y Zeiss With 2X Teleconverter (170mm)
 Nikon 24mm f2.8


Thursday, September 10, 2015

The Canon EF 100-400MM f/4.5-5.6L IS USM With The Sony A7R2

Dale Matson

Click On Photographs To Enlarge
Sony A7R2 With Viltrox Adapter And Canon 100-400 Lens

It became obvious to me attempting to photograph Sierra Nevada Bighorn Sheep with a Sony 70-200 G f4 lens that I used for landscapes that I needed more reach for wildlife.

If Sony full frame e-mount has one glaring deficit, it is a long zoom lens in a full frame camera. I considered getting the 70-400 A mount lens and an A mount adapter. The lens is a tad heavier than the Canon lens and lots more money even used. I already had a Canon adapter and could get a used older model Canon 100-400 lens. The autofocus worked well with my Canon 17-40mm f4 lens using my Viltrox (see photograph) adapter on my A7R. In fact the autofocus worked even faster with my A7R2. I believe the Camera IBIS works with the lens stabilization system.

Although The Canon 100-400mm lens is a pound heavier (at about three pounds) than my Sony 70-200mm lens, I will just have to live with this fact in the mountains if I am including the possibility of wildlife also.

I also had to get a larger model 20 digital holster to accommodate the larger lens on the camera.The handheld trial photographs have been good and the autofocus has worked well in good light. My afternoon shots were under an overcast sky.

Where I have had some auto focus problems is using 400mm to photograph close objects. The lens hunts but won’t autofocus. The “work around” is using the focus peaking feature of the camera with the lens autofocus turned off. My 400mm hummingbird shots were from 25 feet with focus peaking. I have included photographs at various focal distances outside and two photographs taken inside of an oil painting of Shaver Lake.

 250mm f5 1/250
 100mm f4.5 1/50
 400mm f5.6 1/25

 100mm f4.5 1/160
 100mm f5 1/160
 200mm f5.6 1/200
 400mm f5.6 1/400
 200mm f5 1/200
 250mm f5 1/250
 135mm f4.5 1/160
 150mm f4.5 1/160
400mm 5.6 1/400


Saturday, September 5, 2015

The New Sony A7R2 In The Mountains


Dale Matson

Although I am primarily a mountain landscape photographer, I was in the high Sierra Nevada Mountains to photograph Sierra Nevada Bighorn Sheep. My “Long” wildlife lens was my Sony G 70-200 f4 lens, which should have been at least a 400mm lens for the sheep. Needless to say, I will be looking for a lens with a longer reach in the future.

Having got this mea culpa out of the way, I want to talk about the performance of my new camera and the lenses I used for the mountain landscape. A camera is only as good as the lenses attached to it. I left my Canon 17-40mm f4 lens at home for the sake of the backpacking weight and opted for an adapted Nikon 24mm f2.8 lens for wide angle.[ I have some photographs taken with my adapted Canon 17-40mm f4 and the A7R2 here: http://midsierramusing.blogspot.com/2015/08/yosemite-day-hike-to-ostrander-lake.html.]
The Metabones Nikon to NEX adapter did not allow my camera to communicate with this lens. I set the lens aperture to 11 and kept the camera on “Auto”. The camera determined the exposure time of 1/160. The exposure time was available in the file data. I was pleased with the one shot I took with this lens and it certainly was a good pairing with the A7R2. It could have been used more often but at the altitude I was working, I left it out of my daypack and back at basecamp to keep the weight down. All of my shots were with the camera mode dial set on “Auto”.

I used my Sony Zeiss 55mm f1.8 lens for most of my “walking around” shots and was pleased with what a great pairing it was with the camera. I cannot say enough good about how crisp this lens is with this camera including instant autofocus and the fact that it is stabilized when paired with the A7R2. I used to get an occasional out of focus shot with this lens on the A7R.

This was the most often I have used the Sony G 70-200 f4 lens in the mountains. I don’t know if the lens OSS (which I kept “on”) works in conjunction with the camera IBIS but all my shots were handheld and I had no out of focus/blurry shots even at 200mm. This lens worked well as a mountain landscape lens.

I like the locking feature on the mode dial and have had it inadvertently change settings on my A7R. Although the camera is a tad heavier than the A7R I had no need for a tripod and the additional weight. It also feels better in the hands and is better balanced with the 70-200 lens.

I carried my camera in a Digital Holster 10 V2.0. which allowed me quick access and kept my hands free to scramble on boulders. It accommodates the camera and 55mm lens nicely and expands via a zipper at the bottom to accommodate the camera with the 70-200 mm lens on it.

The files were huge but large enough to crop to show the sheep at a distance of a half-mile. They literally could not be seen with the unaided eye. I have included several shots at full resolution. Feel free to comment or ask questions. I am an amateur photographer so it is better that I let the photographs speak for themselves. The "View Actual Size" on Mac preview were crisp and clear. I could read the name "Katadyn" on my green filter water bottle in front of my tent easily. The cropped sheep files are in the previous article.

Click On Photographs To Enlarge
 Mt. Whitney 200mm F5.6 1/250 
 Olancha Peak 
 Red Rock Canyon 55mm F8 1/125
 Mt. Whitney 55mm F10 1/160
 55mm F4 1/160


 70mm f4.5 1/100


 55mm f4 1/160 6:40am

 200mm f4 1/200


 200mm f4 1/200
 24mm Nikon Lens
 Olancha Peak 55mm f4 1/160
 Cottonwood Lakes Basin From Basecamp Above
Mt Whitney From Horseshoe Meadows Road 55mm F5.6 1/125 6:45pm